This is an old revision of the document!
Connecting to Sincoolka Wifi network
Right now, the certificate we use is signed by a trusted certification authority (DigiCert or TERENA). The connection should therefore work without bigger issues. If not, then it is necessary to download and install CA certificate from CESNET webpage (TERENA SSL CA 3) to the trusted root certificate authorities store.
Windows
All done? Great, we can move on to connecting!
- Turn on Wifi.
- Click on the network icon in the bottom right corner - a list of Wifi networks should open.
- Find Sincoolka network in the list. Click on it and click Connect.
- After a while, a window appears to enter your login credentials. Enter your school mail and password (the ones you registered with to SINIS).
- In the background, a prompt may appear to verify the identity of the server. Check that the server certificate is signed by TERENA SSL CA 3 and/or that the certificate fingerprint is:
CC:77:A0:85:88:CA:0C:F8:89:15:28:FB:3B:1D:70:B2:CA:10:B3:8D
(it is sufficient just to verify first few letters) and click Connect or Accept.
- It might happen that you might need to enter your credentials once more.
In case you have issues with the login, check that you really enter correct e-mail address and password. If it doesn't work, try adding the network manually:
- Right-click on the Network icon on the bottom right and select Open Network and Sharing Center.
- Click on the Set Up a Connection or Network. A new window should open.

- Select Manually connect to a wireless network and click Next.
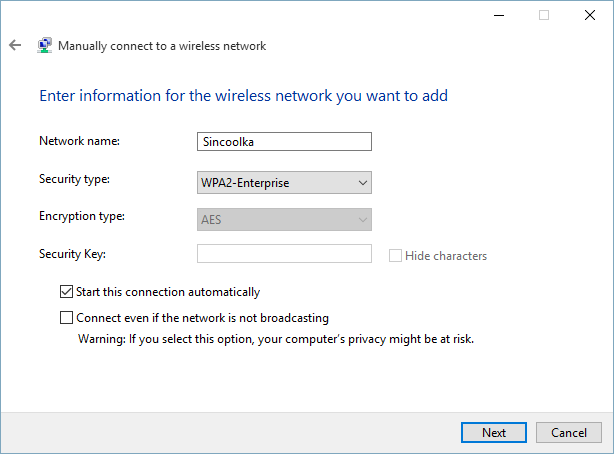
- Enter network name: Sincoolka, security type: WPA2-Enterprise, then click Next.
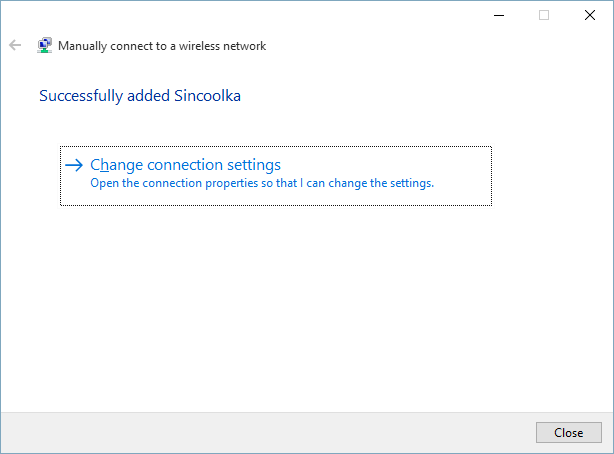
- Do NOT close the window, click on Change connection settings instead.
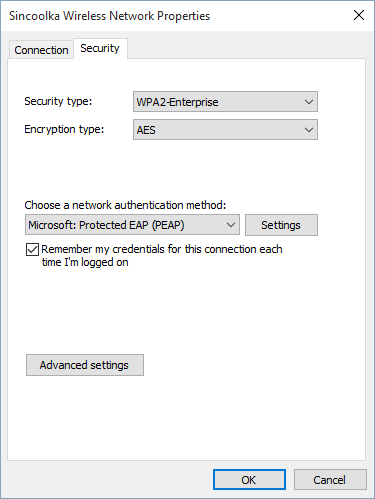
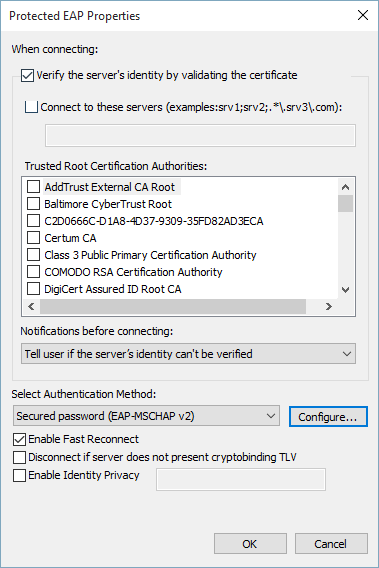
- Check and correct the following settings on the Security tab:
- Network authentication method - Microsoft: Protected EAP (PEAP) or TTLS
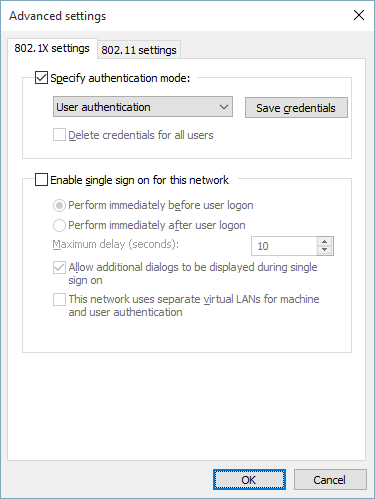
- Advanced settings - Specify authentication mode - User authentication
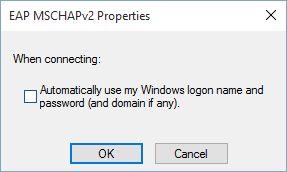
- Settings - Select Authentication Method - Secured Password (EAP-MSCHAP v2);
- click Configure next to the combo box and deselect the only checkbox in that window (Automatically use my Windows logon name and password).
- Afterwards, confirm every window with OK and connect to the Sincoolka network through the list of Wifi networks.
iPhone
- Turn on Wifi and go to Settings → Wifi.
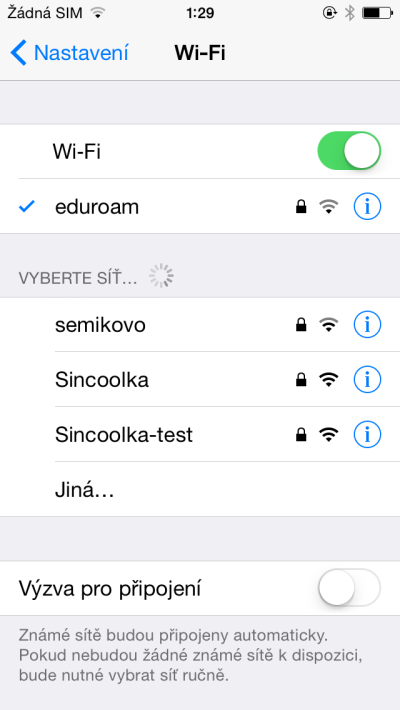
- Choose Sincoolka network.
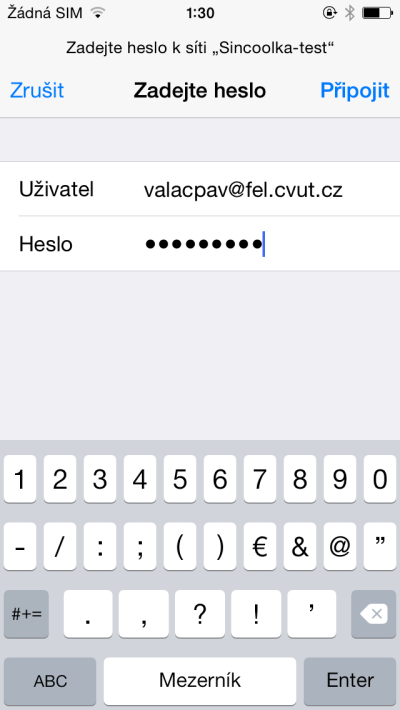
- Enter your SINIS login email and password.
- It is likely that you will be required to verify the server certificate. Check that the server certificate is signed by TERENA SSL CA 3 and/or that the certificate fingerprint is:
CC:77:A0:85:88:CA:0C:F8:89:15:28:FB:3B:1D:70:B2:CA:10:B3:8D
(it is sufficient just to verify first few letters) and click Accept or Connect.
Android
- Turn on Wifi and go to Settings → Wifi.
- Choose Sincoolka network. A window should open to enter login credentials.
- Check that you have either PEAP or TTLS chosen in the EAP method field.
- In Identity, enter your login email to SINIS and in Password, enter your password..
- Tap Connect.
Linux - Ubuntu, NetworkManager
It is usually best to obey the instructions of your network manager. The connection settings might be a bit difficult to fill correctly; thus, the following settings for NetworkManager are recommended:
- Security: WPA2-Enterprise
- Authentication mode: Protected EAP (PEAP) or TTLS
- MSCHAPv2, or PAP for TTLS
- CA certificate can be downloaded from CESNET (TERENA SSL CA 3). It is usually required for successful connection.
- User name and Password - does not require explanation

Troubleshooting
I cannot see Sincoolka network in the network list anymore. Why?
You have probably been using Sincoolka network before. The security settings might have changed, though. The network will be hidden at the end of the list.
Windows
Windows 7
The Sincoolka network should appear at the very end of the networks list, accompanied by a red cross. Click Open Network and Sharing Center link on the bottom of the window, then on Manage wireless networks and remove Sincoolka network from the list. Now, open the Wifi networks screen again; Sincoolka should be up and available for connection.
Windows 8, 8.1, 10
The Sincoolka network should appear at the very end of the networks list, accompanied by a white cross in red circle. Select it and click Connect, or Delete and then again Connect.
Linux
In case Network Manager is having issues with the network settings change, you'll need to Edit connections and either remove or change the network settings (see recommended settings above).
Other issues
After entering my credentials, a message appears: “Cannot log in to this network.”
Check your school email and password twice. It is required to enter whole email address, including domain.
For Linux machines, you need the CA certificate for verification; download it from the CESNET website (TERENA SSL CA 3).
If you weren't able to solve your issue, please come to LAB during office hours.