This is an old revision of the document!
Setting up Wi-Fi on Windows
- Turn on Wifi.
- Click on the network icon in the bottom right corner - a list of Wifi networks should open.
- Find Sincoolka network in the list. Click on it and click Connect.
- After a while, a window appears to enter your login credentials. Enter your school mail and password (the ones you registered with to SINIS).
- In the background, a prompt may appear to verify the identity of the server. Check that the server certificate is signed by TERENA SSL CA 3 and/or that the certificate fingerprint is:
CC:77:A0:85:88:CA:0C:F8:89:15:28:FB:3B:1D:70:B2:CA:10:B3:8D
(it is sufficient just to verify first few letters)
and click Connect or Accept. - It might happen that you might need to enter your credentials once more.
In case you have issues with the login, check that you really enter correct e-mail address and password. If it doesn't work, try adding the network manually:
- Right-click on the Network icon on the bottom right and select Open Network and Sharing Center.
- Click on the Set Up a Connection or Network. A new window should open.

- Select Manually connect to a wireless network and click Next.
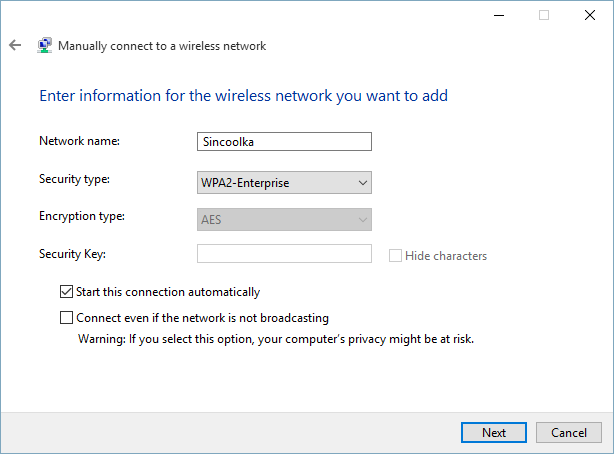
- Enter network name: Sincoolka, security type: WPA2-Enterprise, then click Next.
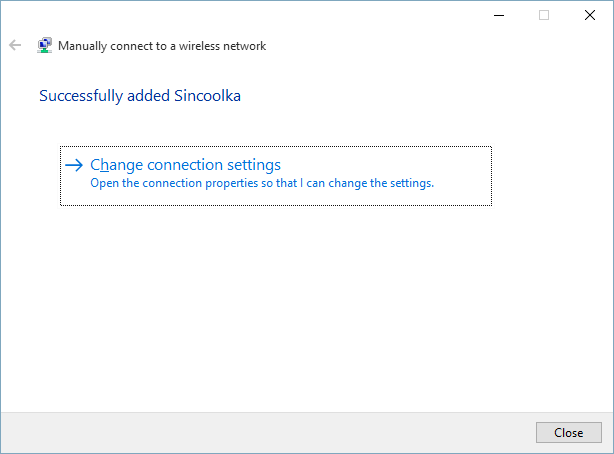
- Do NOT close the window, click on Change connection settings instead.
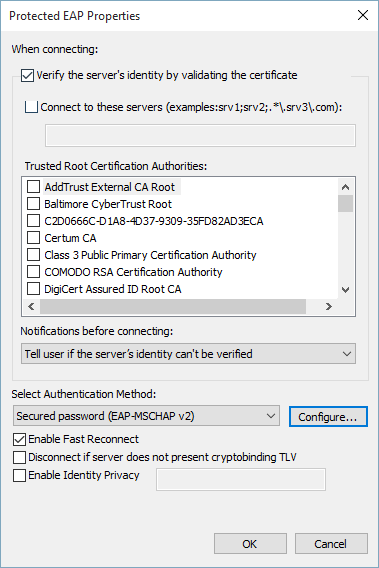
- Check and correct the following settings on the Security tab:
- Network authentication method - Microsoft: Protected EAP (PEAP) or TTLS
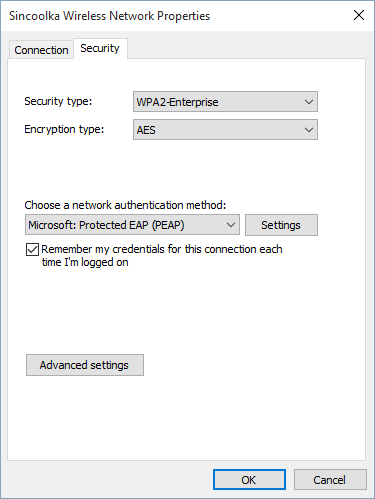
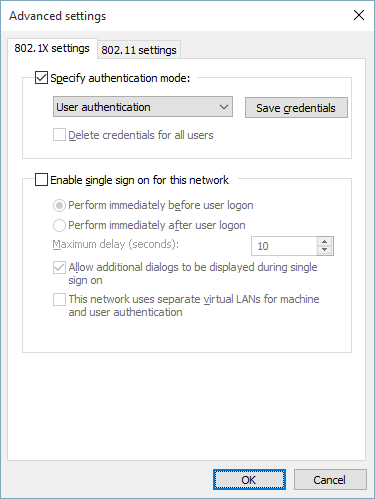
- Advanced settings - Specify authentication mode - User authentication
- Settings - Select Authentication Method - Secured Password (EAP-MSCHAP v2);
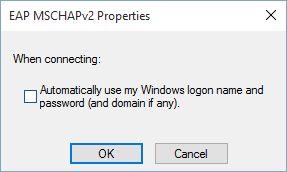
- click Configure next to the combo box and deselect the only checkbox in that window (Automatically use my Windows logon name and password).
- Afterwards, confirm every window with OK and connect to the Sincoolka network through the list of Wifi networks.