This is an old revision of the document!
How to install the network printer in Mac OS X
In GUI
We have tested these steps on macOS Monterey (12.1), but this should work since OS X Lion (10.7).
Go to System Settings, then Printers and Scanners.
In the printers list, click the + (Add) button.

The Add Printer dialog will open.
In the upper part, click the globe icon (possibly with “IP” next to it).
Fill out the following (as in the picture below):
- Address:
tisk2.sin.cvut.cz - Protocol: AirPrint
- Queue:
printers/sin-c13-hp-pcl3(SIN-C one three-HP-PCL3, all in lower case)
After filling out all the details, the driver should be automatically assigned. Check that it has Secure AirPrint at the end.
You can choose your own Printer name.
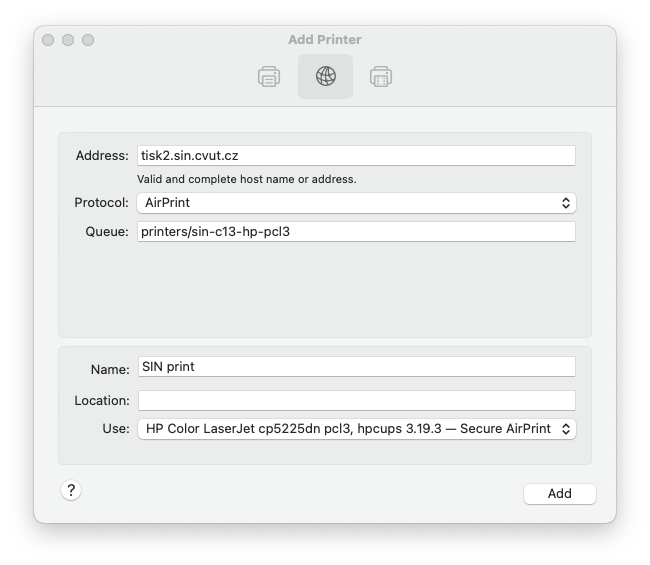
Finally, click the Add button and wait until the printer is added.
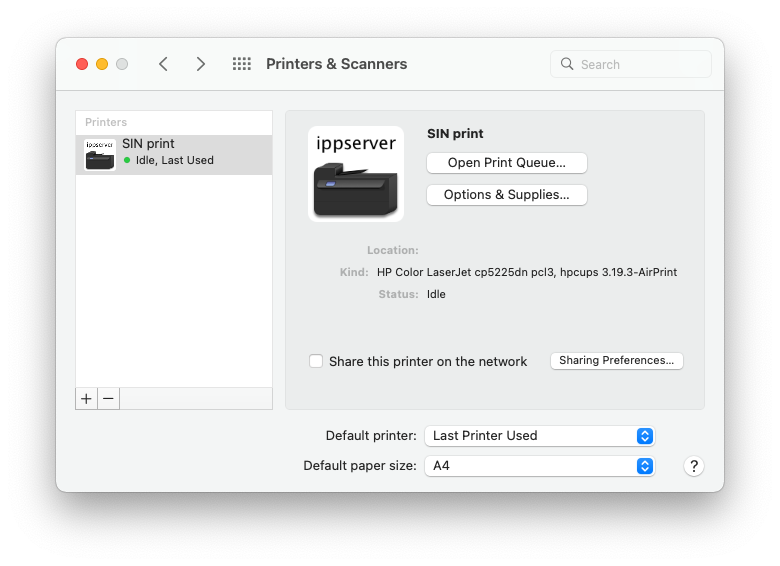
Now printing is available for you!